Proper soil preparation is the cornerstone of successful sod installation. Whether you’re tackling sod installation in Duncanville, TX, or any other region, the principles remain the same. Here’s a comprehensive guide on how to prepare your soil for sod installation, ensuring a lush, healthy lawn.
Evaluating Your Soil
Before starting the preparation process, evaluate the current condition of your soil. Understanding its composition and health will guide your preparation steps.
First, test your soil’s pH and nutrient levels. Soil testing kits are available at most garden centers, or you can send a sample to a local agricultural extension service. Ideal soil pH for most grass types is between 6.0 and 7.5. Amendments may be necessary if your soil is too acidic or alkaline.
In regions like Duncanville, TX, soil often comprises heavy clay, which can impede water drainage and root growth. Loosening the soil by tilling to a depth of 6-8 inches and incorporating organic matter can significantly improve its structure. Organic matter, such as compost or aged manure, enhances soil aeration and water retention, providing a better environment for new sod roots.
Clearing the Area
Clearing the existing vegetation is a crucial step. Existing grass and weeds compete with new sod for nutrients and water, leading to poor sod establishment.
Begin by mowing the existing grass as short as possible. Apply a non-selective herbicide to eliminate any existing vegetation. Follow the manufacturer’s instructions carefully and allow sufficient time for the herbicide to work. Typically, you’ll need to wait about two weeks before proceeding to the next steps.
After the vegetation has died, remove it using a sod cutter or by hand. This ensures that all roots and debris are cleared, providing a clean slate for the new sod. It’s particularly important to remove any rocks or large debris that could impede root growth and soil contact.
Amending and Grading the Soil
Proper soil amendments and grading are essential for creating a level surface that promotes healthy sod growth.
Incorporate organic matter, such as compost, into the top 6-8 inches of soil. This improves soil structure, increases nutrient content, and enhances water retention. For heavy clay soils common in areas like Duncanville, TX, adding gypsum can help break up the clay and improve drainage.
Next, grade the soil to ensure proper drainage. Use a rake to create a smooth, even surface, sloping away from buildings to prevent water pooling. A slight slope of 1-2{fd127e662fe63d1862f567de872d069f5926bce3513ebafc2f7f71333c7927cc} is generally sufficient. Use a lawn roller to compact the soil lightly, then re-rake to remove any remaining low spots.
Fertilizing and Watering
Proper fertilization and initial watering are critical for sod establishment.
Apply a starter fertilizer to provide essential nutrients for the new sod. Choose a fertilizer high in phosphorus to promote root development. Follow the recommended application rate on the fertilizer package to avoid over-fertilization, which can damage young sod.
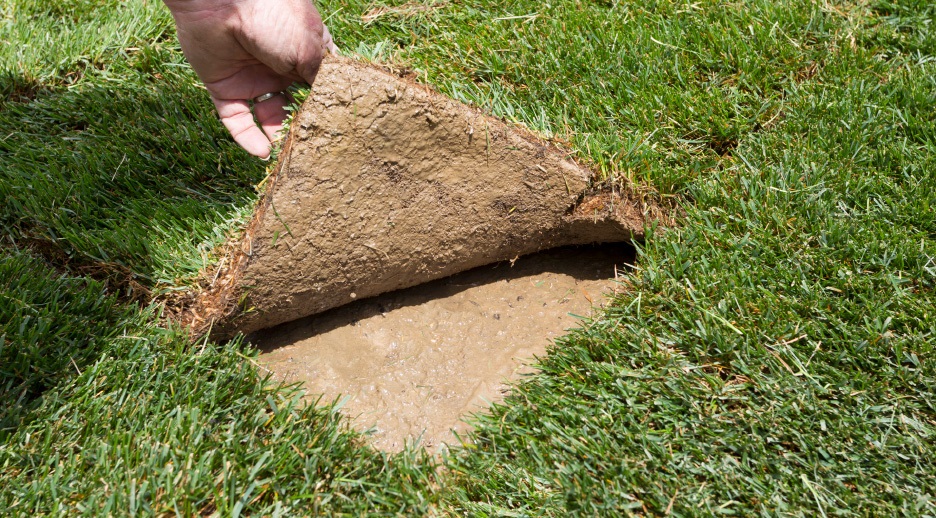
Water the soil thoroughly before laying the sod. The soil should be moist but not waterlogged. Proper moisture ensures good soil-to-sod contact, which is essential for root establishment. In Duncanville, TX, where summers can be hot and dry, maintaining adequate soil moisture is particularly important.
Laying the Sod
Laying the sod correctly is the final step in the installation process.
Start by laying the sod along a straight edge, such as a sidewalk or driveway. Lay subsequent rows in a staggered brick-like pattern to minimize seams and prevent erosion. Ensure that the edges of the sod pieces fit tightly together without overlapping.
Use a lawn roller to press the sod firmly into the soil, ensuring good contact between the roots and the soil. This step helps eliminate air pockets and promotes root growth.
Post-Installation Care
The first few weeks after sod installation are critical for root establishment and overall lawn health.
Water the new sod immediately after installation, keeping it consistently moist for the first two weeks. In hot climates like Duncanville, TX, you may need to water 2-3 times a day to prevent the sod from drying out. Gradually reduce the frequency of watering as the sod begins to root into the soil.
Avoid heavy foot traffic on the new sod for the first few weeks to allow the roots to establish. Mow the sod for the first time when it reaches about 3-4 inches in height, cutting no more than one-third of the grass blade length.
Common Challenges and Solutions
Several challenges can arise during sod installation, but with proper preparation, they can be mitigated.
Compacted soil is a common issue that hinders root growth. Aerating the soil before sod installation can alleviate compaction. Using a core aerator, remove small plugs of soil to improve air, water, and nutrient penetration.
Weed growth can compete with new sod for resources. Applying a pre-emergent herbicide before laying sod can help prevent weed seeds from germinating. Ensure the herbicide is safe for new sod to avoid damaging young grass.
Watering can be tricky, especially in regions with water restrictions. Installing a smart irrigation system can optimize water usage, ensuring the sod receives adequate moisture without waste. These systems adjust watering schedules based on weather conditions, soil moisture levels, and plant needs.
Conclusion
Successful sod installation in Duncanville, TX, hinges on thorough soil preparation. By evaluating and amending your soil, clearing existing vegetation, and following proper grading, fertilization, and watering practices, you create an ideal environment for your new lawn. Post-installation care, including consistent watering and mowing, further ensures the sod establishes well and thrives.
Investing time and effort into soil preparation sets the stage for a healthy, lush lawn that enhances your property’s beauty and value. Whether you’re a seasoned gardener or a novice, these techniques provide a solid foundation for successful sod installation.